Analyzing AWS VPC Flow Logs with Splunk
In our previous blog, Analyzing AWS VPC Flow Logs with Elasticsearch, AWS SQS, and Filebeat, we talked about pulling AWS VPC Flow logs via AWS SQS and pushing them to an internal Elasticsearch cluster.
In this post, we will look at accomplishing the similar task of ingesting AWS VPC Flow Logs into a local instance of Splunk.
Splunk is a robust software platform designed to swiftly ingest, index, and analyze vast volumes of machine-generated data from diverse sources. With its real-time search capabilities, powerful visualization tools, and adaptability across industries, Splunk enables users to derive actionable insights, monitor IT operations, bolster security, and drive informed decision-making through intuitive data interpretation and visualization.
Prerequisite:
- Splunk Installed and configured
- Splunk Add-on for AWS application
- Amazon AWS account
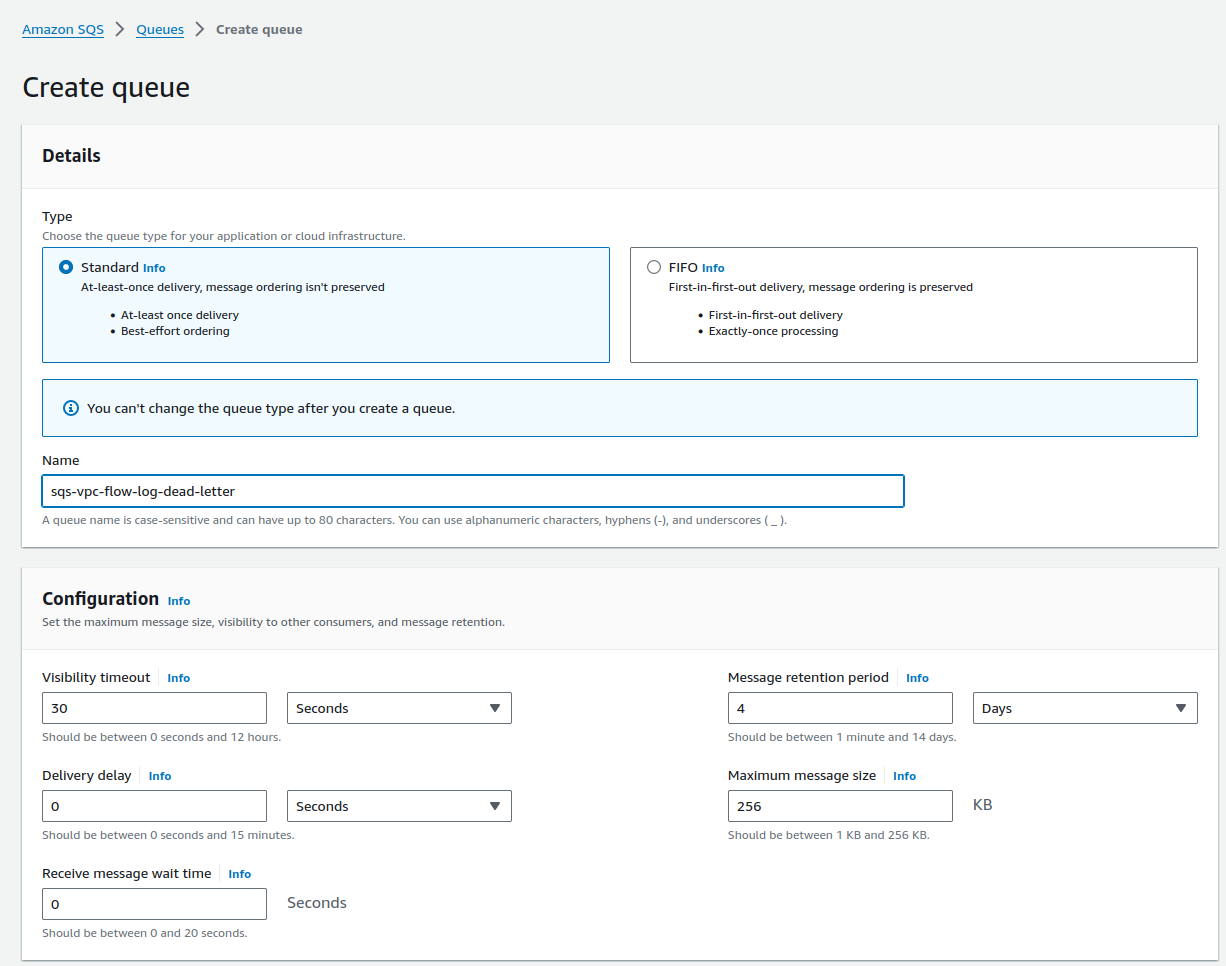
Step 1: Create SQS Dead Letter queue
A Dead Letter Queue (DLQ) is a feature provided by Amazon Simple Queue Service (SQS) and other message queuing systems. It is designed to handle messages that cannot be processed successfully by consumers.
- If you haven’t already, enable VPC Flow Logs for the relevant VPC(s) in your AWS account. Make sure they are being stored in an S3 bucket. The S3 bucket used in this exercise will be “sv-vpc-flow-log-bucket“.
- In your AWS Management Console, navigate to SQS, and create a new standard queue. We will call our queue “sqs-vpc-flow-log-dead-letter“.
- Below is the final result after queue is created

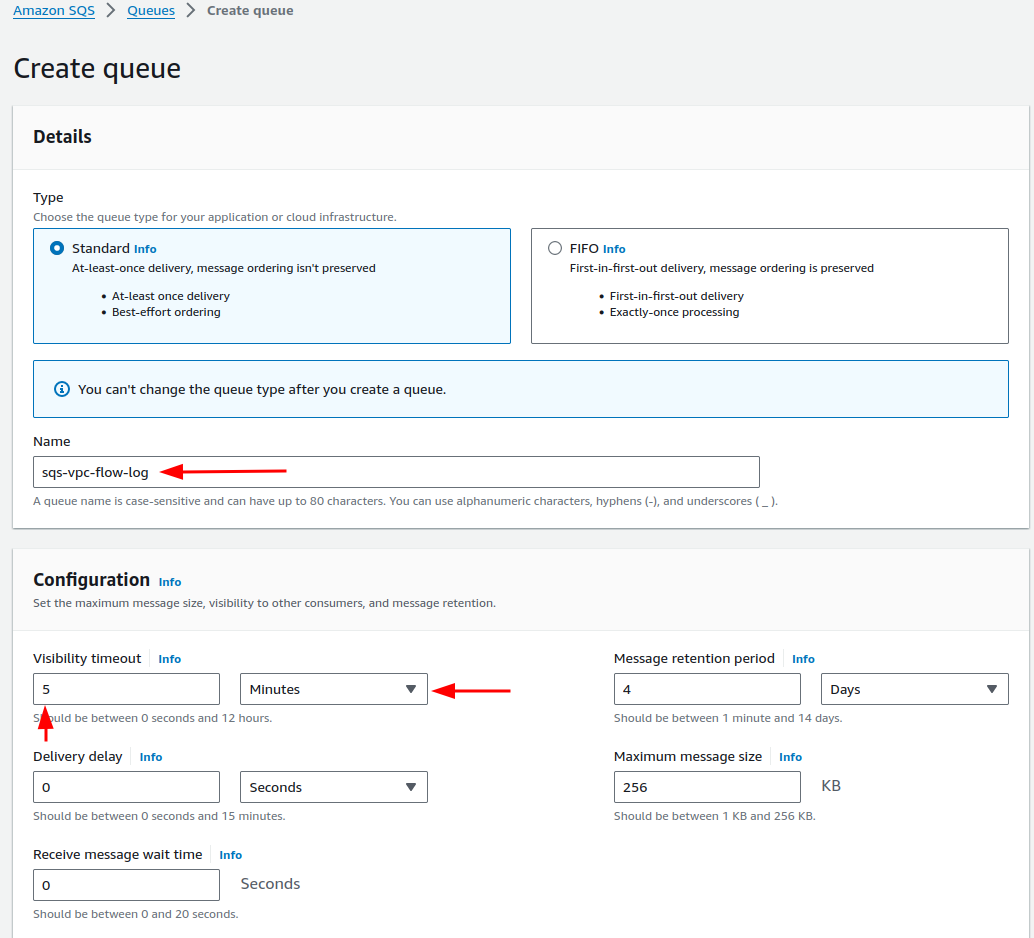
Step 2: Create the SQS Queue
- In your AWS Management Console, navigate to SQS, and create a new standard queue. We will call our queue “sqs-vpc-flow-log“.
- In the configuration section, change the Visibility timeout to 5 minutes
- In the Access Policy section, choose “Advanced“, and update your policy to match the below example. Make sure you update the name of the S3 Bucket, source account and queue name accordingly.
{
  "Version": "2012-10-17",
  "Id": "__default_policy_ID",
  "Statement": [
	{
  	"Sid": "__owner_statement",
  	"Effect": "Allow",
  	"Principal": {
    	"AWS": "arn:aws:iam::0123456789:root"
  	},
  	"Action": [
    	"sqs:*"
  	],
  	"Resource": "arn:aws:sqs:us-east-1:012345679:sqs-vpc-flow-log",
  	"Condition": {
    	"StringEquals": {
      	"aws:SourceAccount": "0123456789"
    	},
    	"ArnLike": {
      	"aws:SourceArn": "arn:aws:s3:*:*:sv-flow-log-bucket"
    	}
  	}
	}
  ]
}
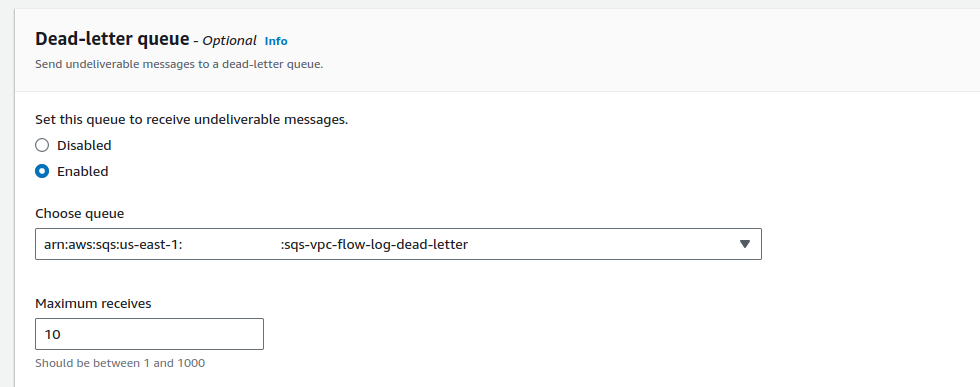
- Next, we will move to the Dead-letter-queue section, enable it and choose the SQS queue we created in step 1.
- Finish by clicking on “Create Queue”
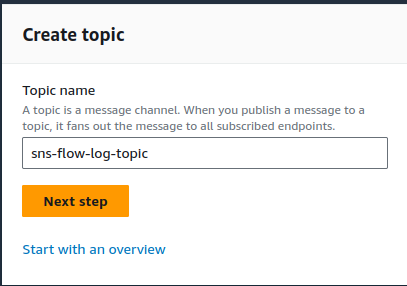
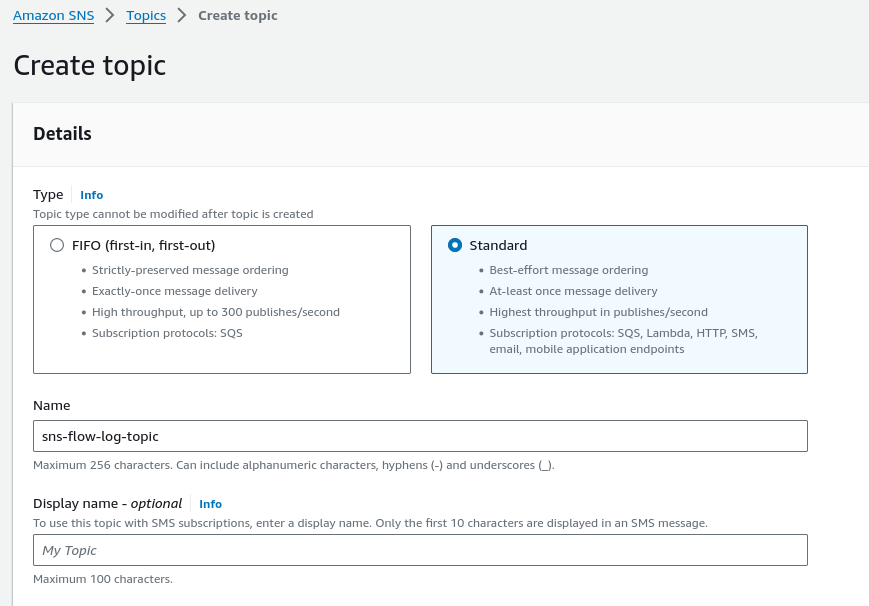
Step 3: SNS Topic Creation
Amazon Simple Notification Service (SNS) is a fully managed messaging service provided by Amazon Web Services (AWS). It enables the sending of messages or notifications to a distributed set of subscribers or endpoints via different communication protocols.
- In your AWS Management Console, navigate to Simple Notification Service (SNS) and create a standard topic.
- In the Access Policy section, choose “Advanced“, and update your policy to match the below example. Make sure you update the name of the S3 Bucket, source account and queue name accordingly.
{
  "Version": "2008-10-17",
  "Id": "__default_policy_ID",
  "Statement": [
	{
  	"Sid": "__default_statement_ID",
  	"Effect": "Allow",
  	"Principal": {
    	"AWS": "*"
  	},
  	"Action": "SNS:Publish",
  	"Resource": "arn:aws:sns:us-east-1:0123456789:sns-flow-log-topic",
  	"Condition": {
    	"StringEquals": {
      	"AWS:SourceAccount": "0123456789"
    	},
    	"ArnLike": {
      	"aws:SourceArn": "arn:aws:s3:*:*:sv-flow-log-bucket"
    	}
  	}
	}
  ]
}
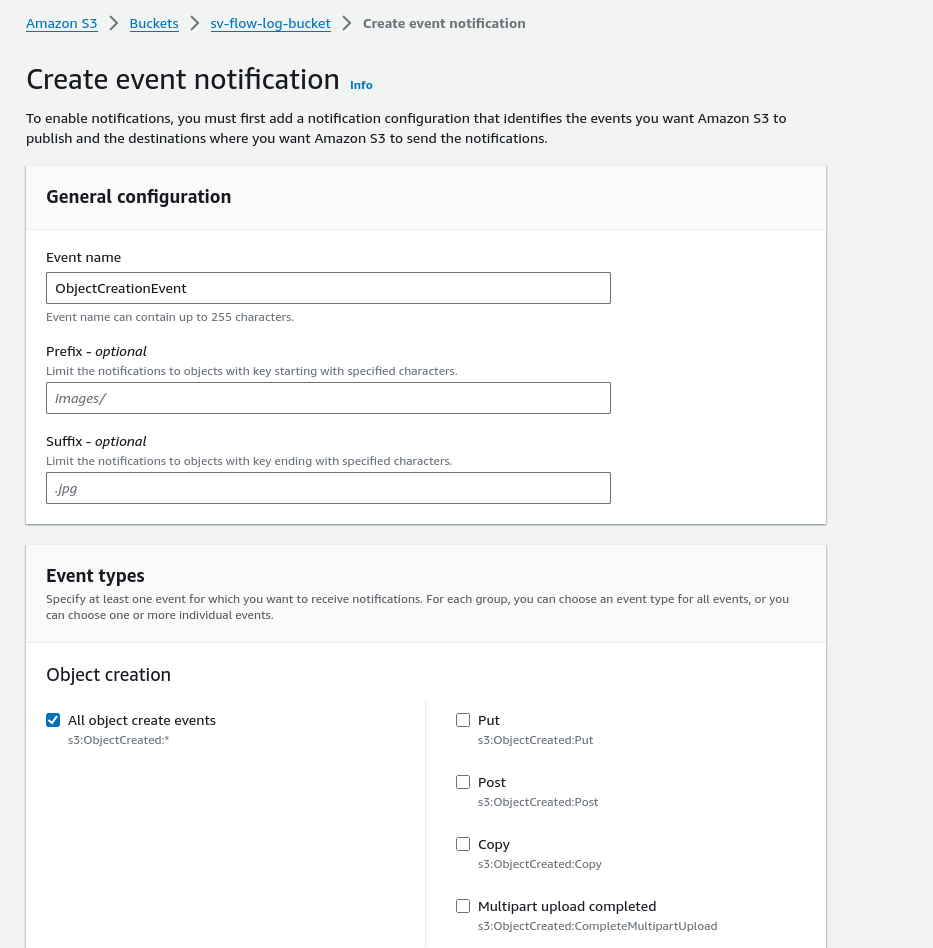
Step 4: Setup the bucket event notification
- In your AWS Management Console, navigate to S3 Buckets and select the s3 bucket storing the VPC Flog logs: “sv-flow-log-bucket“
- Edit the properties
- Navigate the Event notifications section and click on “Create event notification”
- Select “Objection creation” in the Event types
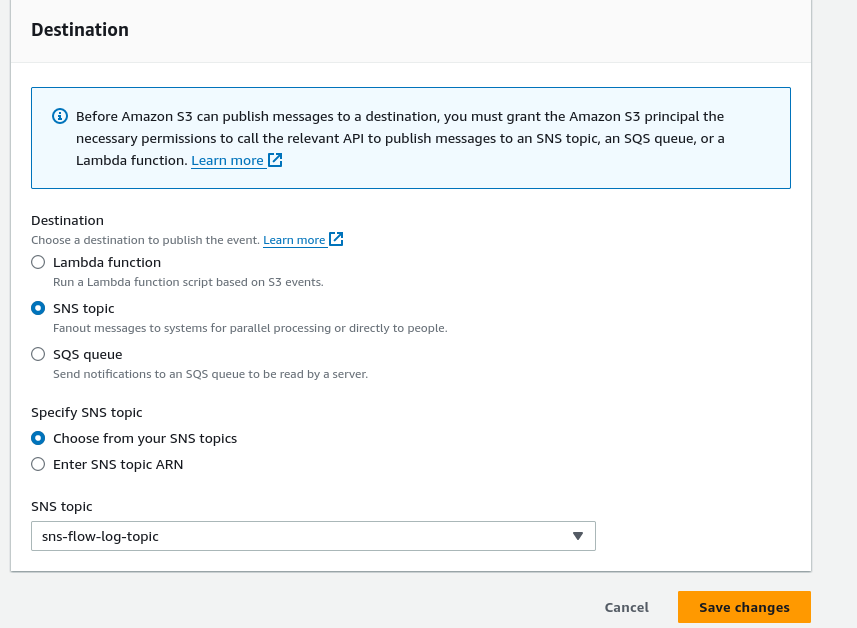
- Pick SNS Topic for destination
- Pick “Choose from your SNS Topics” and select “sns-flow-log-topic” in the drop down box
- Save changes
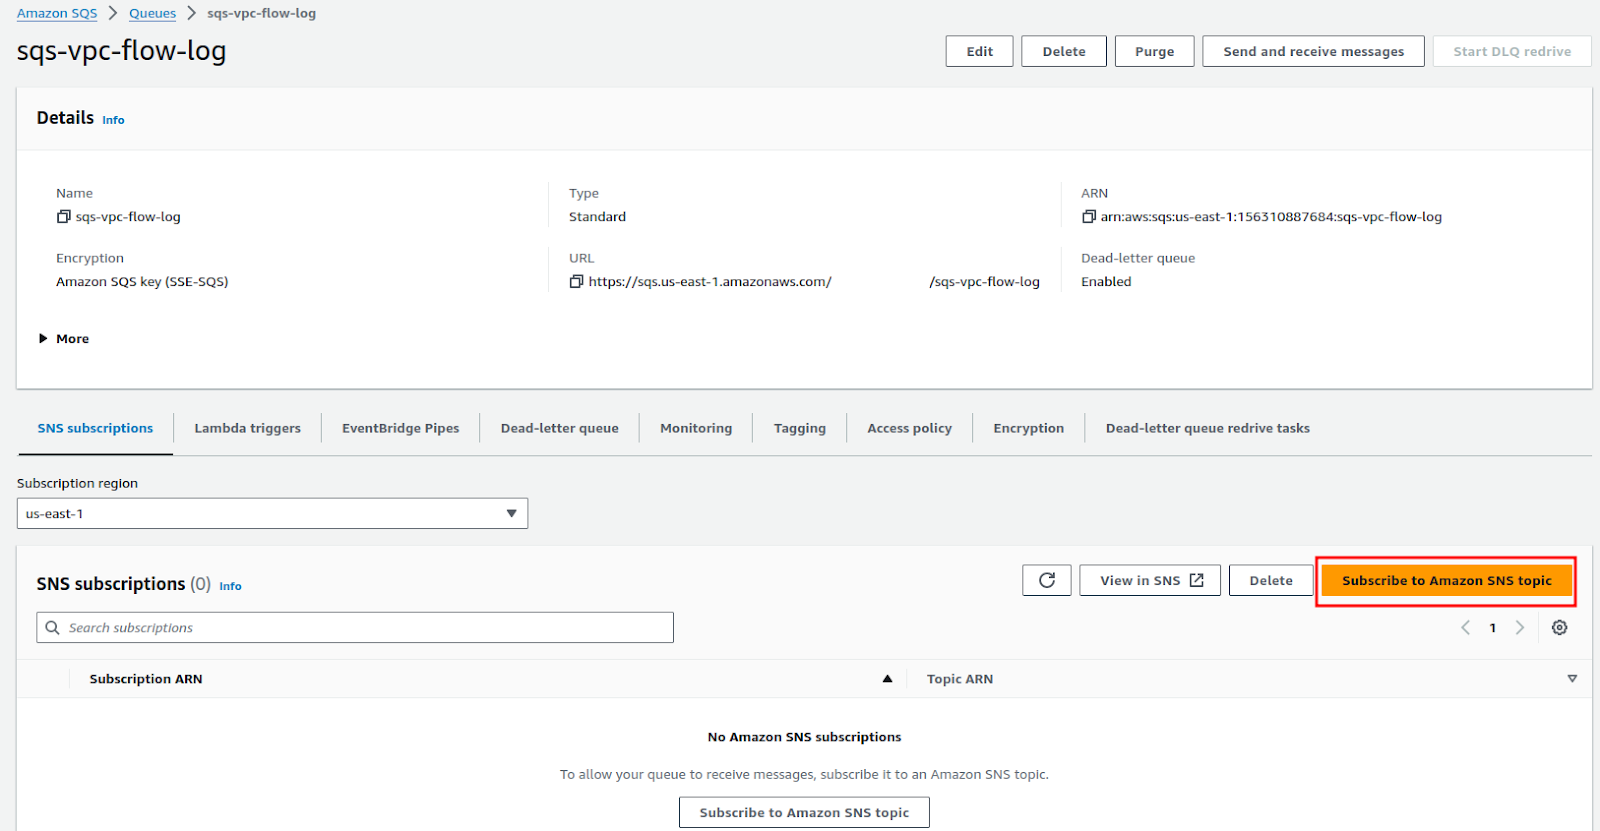
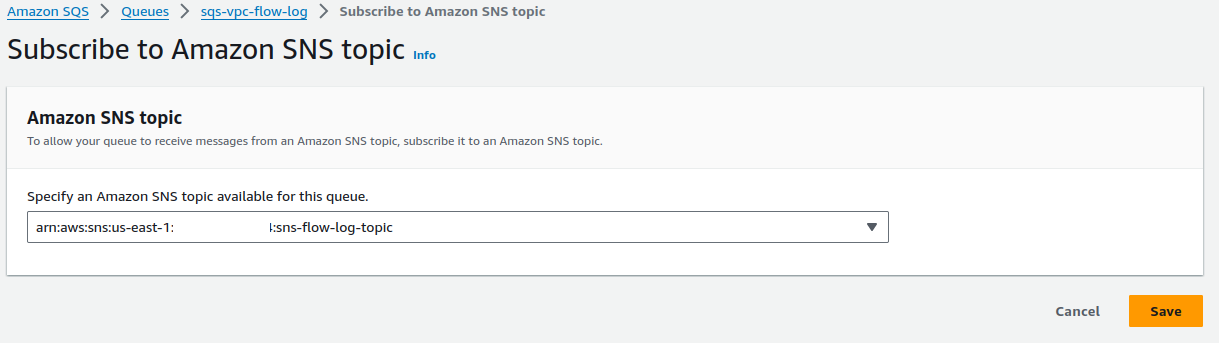
Step 5: Subscribe the SQS to SNS
- Navigate to SQS Console, and select our queue “sqs-vpc-flow-log“
- Click on “Subscribe to Amazon SQS topic“
- Select the existing topic created earlier
- The final result

Step 6: Configure Splunk
- Navigate to the splunk app: Splunk Add-on for AWS
- Click on the configuration section
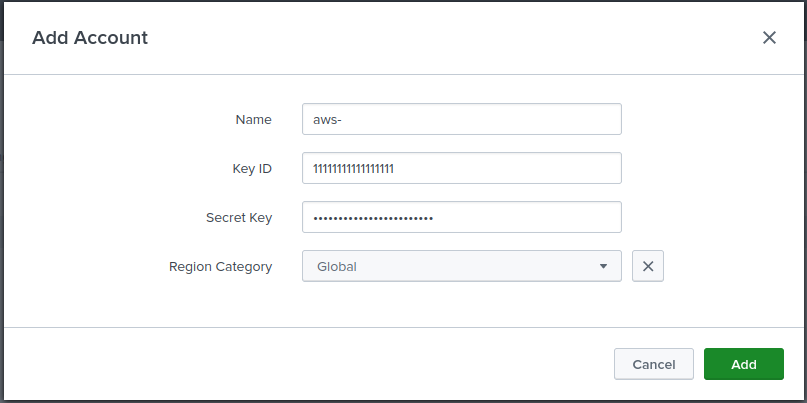
- In the account section, click add to add our AWS Credentials
- Click “Add”
- Click “Inputs” in the tab to move in the inputs section
- Click “Create new inputs”
- Select “S3 Access logs”
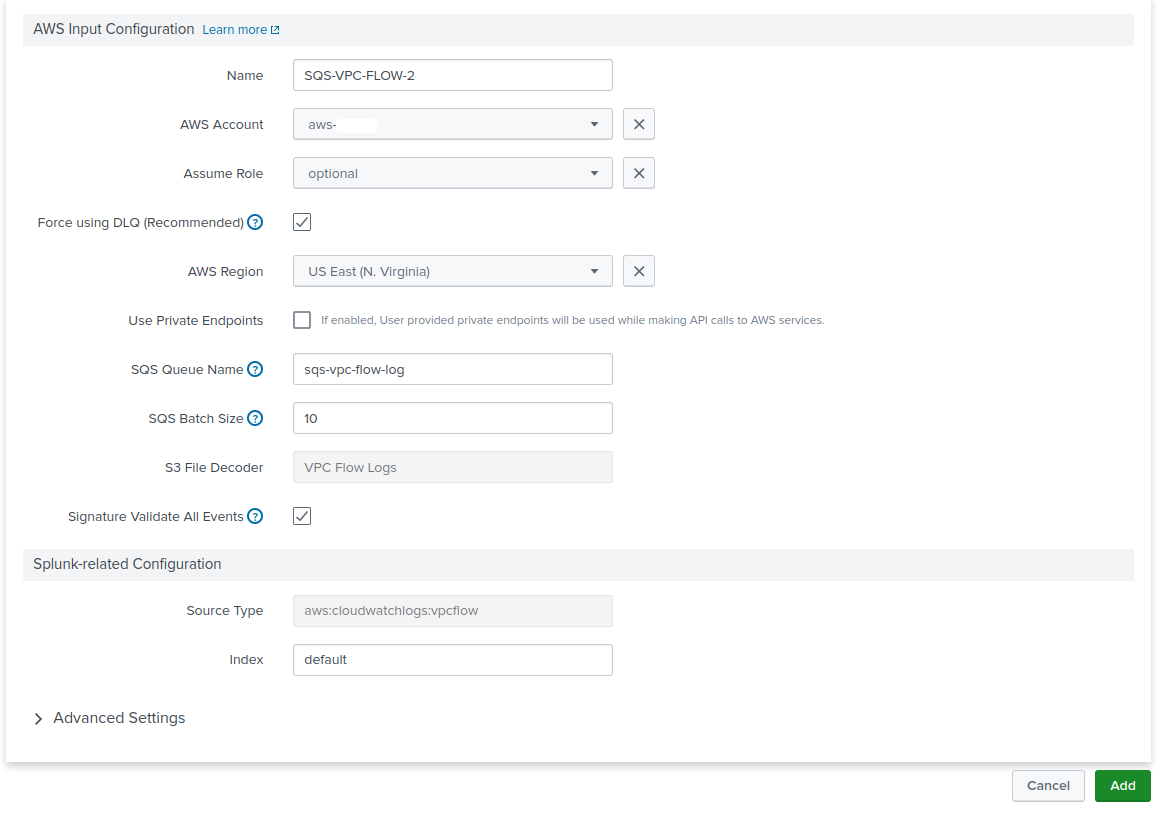
- Select “SQS-Based S3”
- Fill in the appropriate information
- Click add
At this point the Splunk app should be configured and should pulling logs from AWS.
In order to verify that we receiving data, we can navigate to the “Search and Reporting” page of Splunk and use the search below:
* sourcetype="aws:cloudwatchlogs:vpcflow"We should be seeing the result like below:
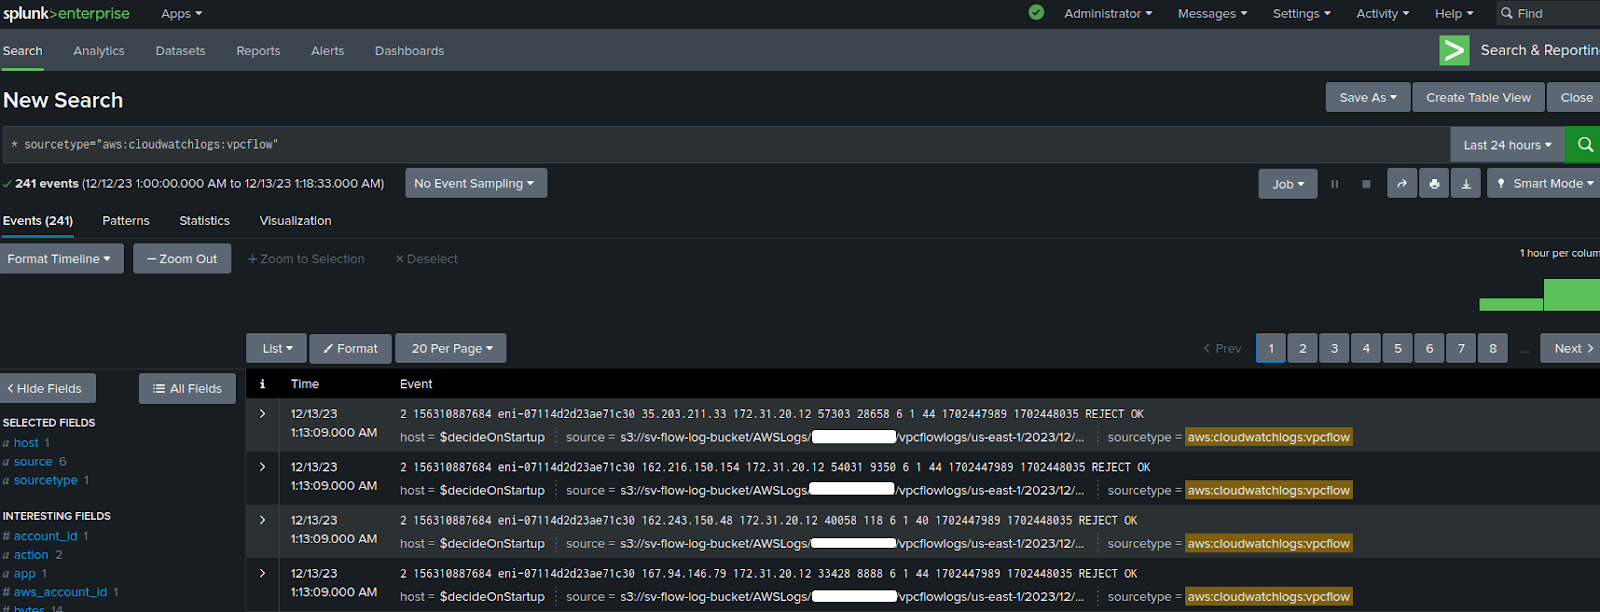
And this conclude our exercise.
If you have any questions or require assistance, we are actively seeking strategic partnerships and would welcome the opportunity to collaborate. Don’t hesitate to contact us!